

Description
Window Cut Soap Sleeves For Clear Product Visibility
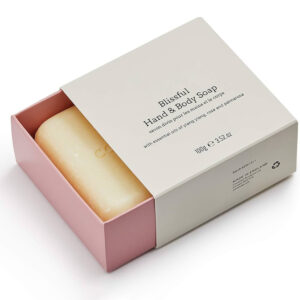
Soap sleeves with window cut-outs combine comprehensive brand coverage with strategic product visibility, creating packaging that satisfies both marketing and customer experience requirements. These sleeves wrap completely around soap bars while featuring precisely die-cut openings that allow customers to see, touch, and smell the actual product before purchase. Starting with just 100-unit minimum orders, window sleeves offer accessible entry for artisan soap makers wanting professional packaging without concealing their handcrafted products.
Balancing Brand Coverage With Product Display
Window sleeves address a fundamental packaging challenge providing complete surface area for branding while enabling sensory product evaluation. Unlike the clear sleeve alternative that offers full visibility with minimal branding space, window sleeves maximize brand presence while delivering targeted product exposure.
Primary packaging advantages include:
- Complete wraparound surface for comprehensive brand messaging
- Strategic window placement enables sensory product evaluation
- Protective coverage during shipping and retail handling
- Professional presentation suitable for premium retail environments
- Scent accessibility without removing packaging
- Visual confirmation of product quality and ingredients
Business implementation scenarios:
- Artisan soap makers highlighting natural ingredients and colors
- Retail brands requiring both branding space and product visibility
- Gift collections where presentation and product preview matter equally
- Premium lines emphasizing quality through transparent display
- Wholesale accounts needing protective coverage with visual appeal
| Business Type | Window Size | Recommended Position | Primary Benefit |
|---|---|---|---|
| Artisan Makers | 2-3 inches | Front center | Ingredient visibility |
| Retail Brands | 1.5-2.5 inches | Front upper | Balanced branding |
| Gift Collections | 2-4 inches | Front center | Visual appeal |
| Wholesale | 1.5-2 inches | Front or side | Protection + display |
Material Construction for Window Applications
Material selection for window sleeves requires balancing structural integrity around cut-out areas with overall aesthetic goals. Die-cut openings reduce material continuity, making weight and quality choices more critical than with solid sleeves.
Paper Stock Weight Considerations (150-250 GSM)
Medium to heavy weight cardstock maintains structural stability around window perimeters while preventing warping or curling during handling. The paper wrap version uses similar materials but without structural concerns from die-cutting. Paper stocks in the 150-200 GSM range provide adequate rigidity for windows up to 2.5 inches.
- 150-180 GSM: Suitable for small windows (under 2 inches), cost-effective
- 180-220 GSM: Balanced choice for medium windows (2-3 inches), versatile
- 220-250 GSM: Best for large windows (3+ inches), premium feel
- Structural integrity maintained around cut-out perimeters
- Prevents edge curling during storage and display
Material selection process includes:
- Measure intended window dimensions and placement
- Calculate remaining material percentage after die-cutting
- Assess handling requirements during shipping and retail display
- Evaluate printing complexity near window edges
- Test samples with actual soap bars for fit verification
| Material Weight | Window Size Limit | Structural Stability | Print Quality | Cost Level |
|---|---|---|---|---|
| 150-180 GSM | Under 2″ | Moderate | Good | Standard |
| 180-220 GSM | 2-3″ | High | Excellent | Moderate |
| 220-250 GSM | 3-4″ | Very High | Superior | Premium |
Material Weight and Window Size Compatibility
Premium cardboard weights deliver maximum structural integrity for large window configurations or irregular aperture shapes. These heavier materials prevent edge lifting and maintain crisp window borders throughout product lifecycle.
Heavyweight material advantages:
- Supports complex window shapes without structural compromise
- Prevents edge warping in humid storage conditions
- Creates substantial, premium tactile experience
- Enables multiple window configurations on single sleeve
- Maintains rigid positioning during retail handling
| Cardboard Grade | Maximum Window Size | Multiple Windows | Best Application |
|---|---|---|---|
| 250-280 GSM | 4 inches | Up to 2 | Premium retail |
| 300-330 GSM | 5 inches | Up to 3 | Luxury brands |
| 330-350 GSM | 6+ inches | Up to 4 | Gift collections |
Cardboard Grade Performance Characteristics
Window configuration choices dramatically impact both visual presentation and functional performance. Shape, size, and position decisions should reflect specific marketing objectives and product characteristics worth highlighting.
Standard Window Shapes and Dimensions
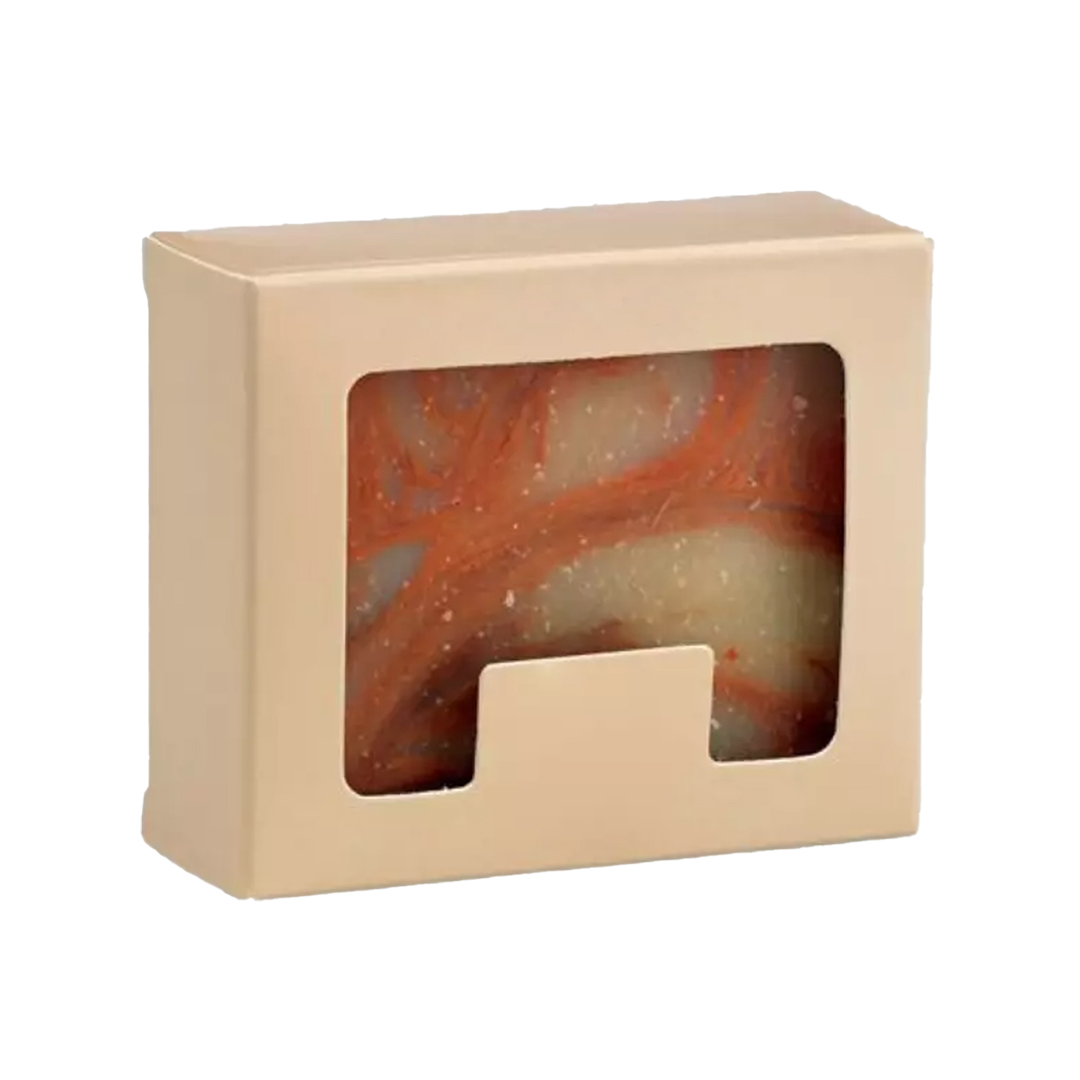
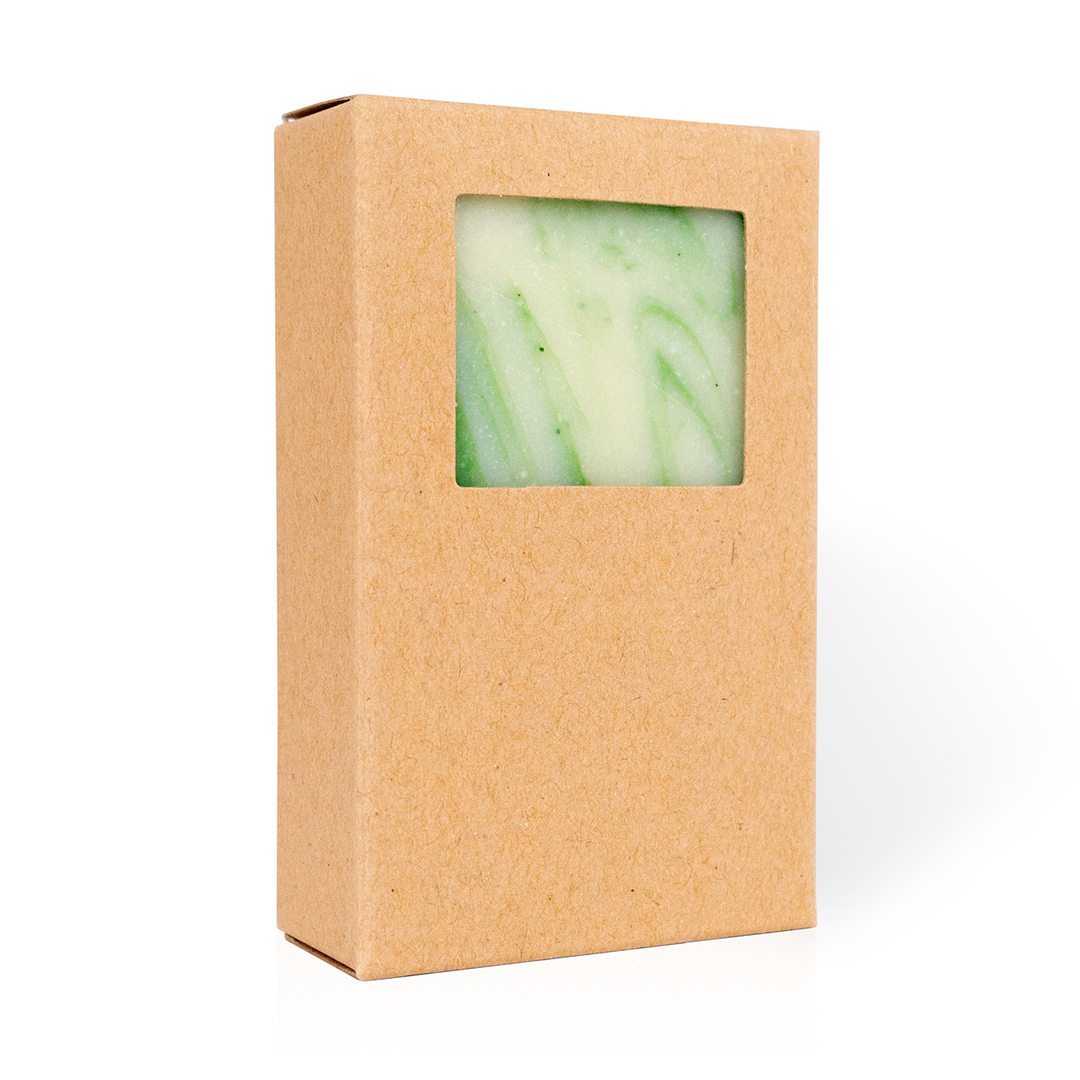
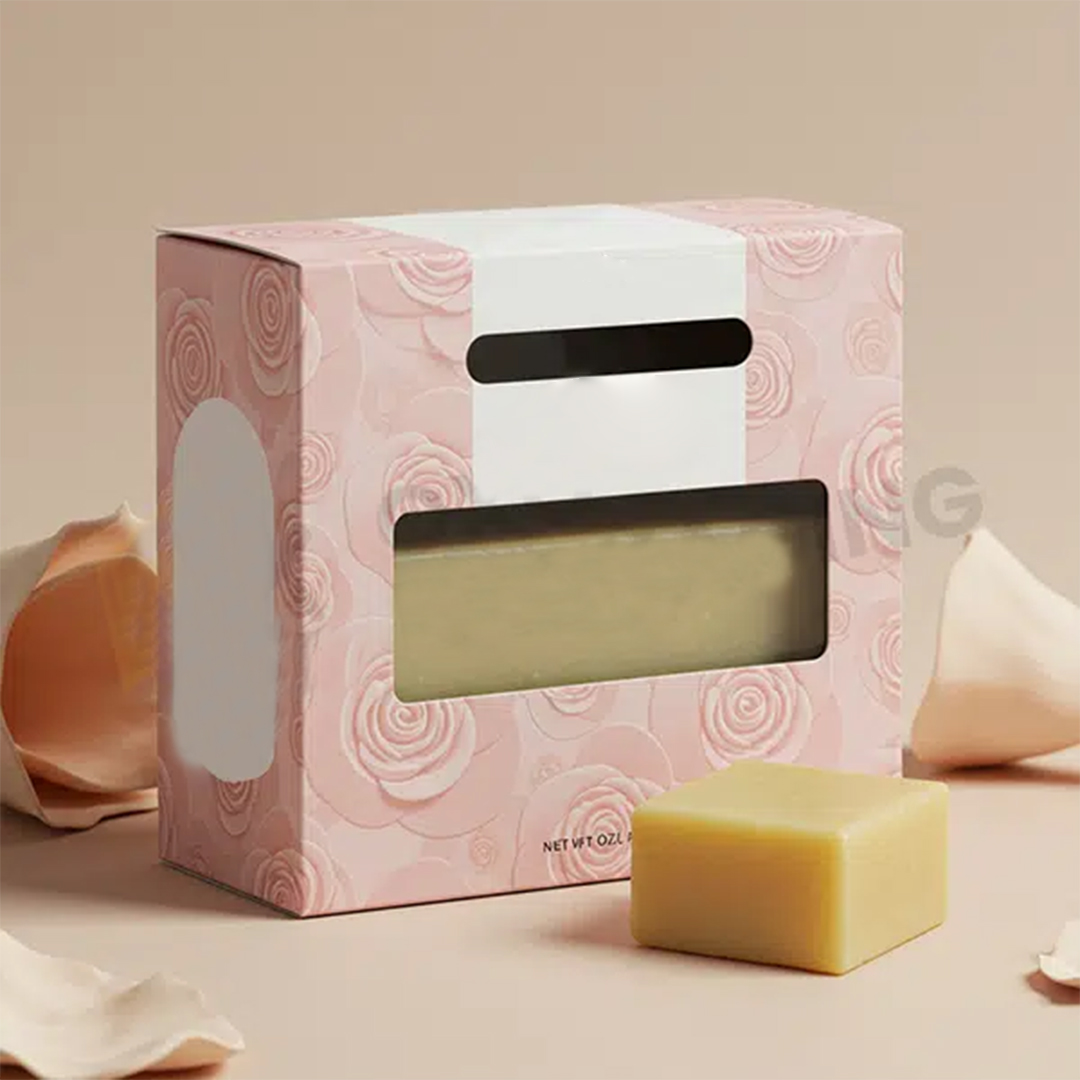
Rectangular windows represent the most common configuration, offering clean lines and efficient die-cutting ranging from 1.5 inches to 4 inches in width. Round or oval windows create softer, more organic appearance particularly suitable for natural soap brands.
- Rectangular: Clean lines, efficient cutting, 1.5-4 inch typical widths
- Round/Oval: Organic appearance, 1-3 inch diameters, premium aesthetic
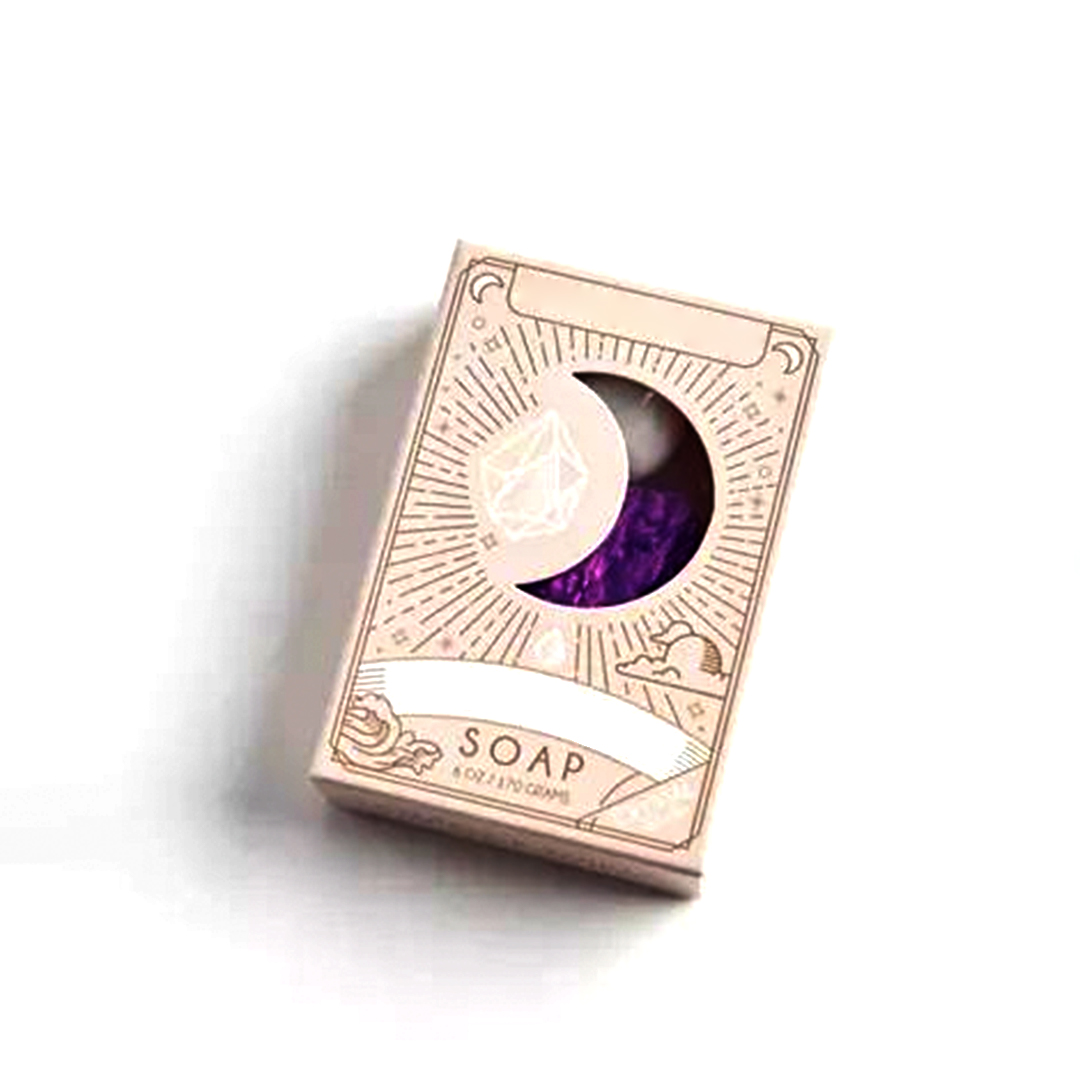
- Custom shapes: Brand-specific designs, soap silhouettes, botanical motifs
- Multiple windows: Strategic placement showing different soap aspects
Window sizing guidelines by soap type:
- Swirled color soaps: Larger windows (3-4 inches) showcase patterns
- Embedded ingredient soaps: Medium windows (2-3 inches) highlight botanicals
- Textured surface soaps: Smaller windows (1.5-2 inches) allow touch
- Natural color soaps: Size appropriate to ingredient visibility needs
| Window Type | Size Range | Die-Cut Complexity | Visual Impact | Cost Premium |
|---|---|---|---|---|
| Rectangle | 1.5-4″ | Simple | Clean, professional | Base |
| Round/Oval | 1-3″ diameter | Moderate | Soft, organic | +10-15% |
| Custom Shape | Varies | Complex | Distinctive, branded | +20-30% |
| Multiple Windows | Combined area | High | Dynamic, informative | +25-35% |
Window Configuration and Production Details
The premium printed version incorporates complex graphics around window perimeters, requiring precise registration between printed elements and die-cut openings for a professional appearance. This accuracy ensures branding remains perfectly centered with the cutout, preventing any visual distortion of the product inside. By maintaining these strict standards, brands offer a sophisticated window display that highlights artisanal quality while reinforcing a luxury aesthetic.
Strategic window placement considers both customer shopping behavior and retail display configurations. Front-facing windows ensure visibility when products face forward on shelves, while side windows work better for products displayed in depth or stacked.
Positioning recommendations include:
- Front center: Maximum visibility, symmetrical balance, product focus
- Front upper: Preserves lower space for information, scent access
- Front lower: Highlights soap base, maintains upper branding space
- Side placement: Effective for depth displays, multiple viewing angles
| Position | Visibility | Information Space | Retail Display Fit | Application Ease |
|---|---|---|---|---|
| Front Center | Maximum | Moderate | Face-out shelves | Easy |
| Front Upper | High | Good (lower) | All orientations | Easy |
| Front Lower | High | Good (upper) | All orientations | Moderate |
| Side | Moderate | Maximum front | Depth displays | Complex |
Window Position Performance Comparison
Understanding window style sleeves preferences across different market segments helps optimize positioning strategy. t also guides whether you should emphasize ingredient visibility, premium finishing, or protective structure based on where the product will be sold and how shoppers make decisions there.
Printing near window perimeters requires precise registration ensuring graphics align properly with die-cut openings. Design elements should maintain minimum 2-3mm distance from window edges preventing registration issues.
Registration Requirements and Quality Control
Digital and offset printing both accommodate window designs, though offset provides superior consistency across large runs. Registration tolerance typically ranges from ±0.5mm to ±1mm depending on printing method.
- Maintain 2-3mm minimum clearance between graphics and window edges
- Use registration marks for precise die-cutting alignment
- Test print samples before full production commitment
- Plan white space strategically around window perimeters
Quality control checkpoints include:
- Digital proof review showing window placement relative to design
- First article inspection verifying registration accuracy
- Die-cutting precision measurement ensuring consistent dimensions
- Edge quality assessment checking for clean cuts
- Overall appearance evaluation with actual soap inserted
| Printing Method | Registration Tolerance | Design Clearance | Quality Consistency | Volume Suitability |
|---|---|---|---|---|
| Digital | ±1mm | 3mm recommended | Good | 100-1,000 units |
| Offset | ±0.5mm | 2mm acceptable | Excellent | 1,000+ units |
Printing Method Registration Standards
The exact fit sleeve requires even more precise registration when incorporating windows, as custom dimensions leave less margin for error. This tight tolerance ensures that branding elements align perfectly with the die-cut edges for a clean, professional finish. Mastering this accuracy allows brands to showcase their product clearly while maintaining structural integrity across all premium packaging components.
Standard coatings apply successfully to window sleeves, though special attention around die-cut edges prevents coating buildup or rough edges. Matte and gloss finishes both work well.
Finishing options include:
- Matte coating: Subtle appearance, fingerprint resistant, natural aesthetic
- Gloss coating: Vibrant colors, moisture protection, contemporary feel
- Spot UV: Highlighting specific elements away from window areas
- Soft touch: Premium tactile experience, works around windows
- Embossing: Best applied away from window perimeters for stability
| Finish Type | Window Compatibility | Edge Quality | Application Complexity | Cost Addition |
|---|---|---|---|---|
| Matte/Gloss | Excellent | Clean edges | Standard | Base |
| Spot UV | Good (away from edges) | Requires care | Moderate | +$0.10-0.15 |
| Embossing | Moderate (solid areas) | Edge sensitive | Complex | +$0.12-0.18 |
| Foil Stamp | Good (solid areas) | Clean | Moderate-Complex | +$0.15-0.25 |
Finishing Compatibility Around Apertures
Finishing around windows requires careful planning ensuring decorative elements enhance rather than distract from product visibility. The material section offers guidance on how different substrates accept various finishing techniques.
Successful window sleeve design treats the aperture as integral design element rather than afterthought, incorporating the opening into overall visual composition and brand narrative.
Creating Visual Flow With Window Elements
Window perimeters offer opportunities for creative framing through printed borders, patterns, or graphics directing attention toward product visibility. Graphic elements surrounding windows should complement rather than compete with visible soap characteristics.
Design integration approaches include:
- Decorative borders framing window like picture frame
- Gradient designs transitioning toward window edges
- Pattern elements radiating from window perimeter
- Typography arranged around window respecting sight lines
| Design Approach | Visual Impact | Brand Flexibility | Production Complexity | Best For |
|---|---|---|---|---|
| Minimal Border | Clean, modern | High | Low | Contemporary brands |
| Decorative Frame | Traditional, detailed | Moderate | Moderate | Heritage brands |
| Integrated Graphics | Dynamic, creative | Low | High | Artistic brands |
| Pattern-Based | Bold, distinctive | Moderate | Moderate | Style-focused brands |
Design Approach Comparison for Windows
Design software should incorporate actual window dimensions early in creative process, allowing designers to visualize how printed elements interact with product visibility.
Windows consume valuable surface area requiring thoughtful information hierarchy ensuring essential details communicate effectively despite reduced space.
Information placement strategy includes:
- Primary branding (logo, product name) on most visible surface
- Key differentiators adjacent to window where customers naturally look
- Ingredient lists and regulatory information on side or back panels
- Benefits and usage instructions on surfaces with adequate space
| Content Type | Recommended Placement | Minimum Size | Priority Level |
|---|---|---|---|
| Brand Logo | Front (away from window) | 1-1.5″ | Critical |
| Product Name | Front with logo | 14-18 pt | Critical |
| Key Benefits | Around window | 10-12 pt | High |
| Ingredients | Side/back | 7-8 pt | Moderate |
| Regulatory | Back | 6 pt min | Required |
Performance metrics across channels include:
- Retail stores: Increased conversion through sensory evaluation
- Farmers markets: Product sampling without unwrapping
- E-commerce: Enhanced photography showing actual product
- Gift markets: Presentation quality with product preview
Performance Metrics Across Sales Channels
Window sleeves bridge the gap between fully covered packaging prioritizing branding and minimal wrapping emphasizing product. This balance resonates with customers valuing both professional presentation and product transparency.
Production Timeline and Cost Structure
Window sleeves require additional die-cutting processes compared to standard sleeves. Understanding workflow helps businesses plan inventory needs effectively.
Die creation for precise window cutting adds 1-2 days to standard production timelines. Production begins with design finalization and material selection, followed by proof approval.
- Design approval and material selection: 1-2 business days
- Die creation for window cutting: 1-2 days
- Printing execution: 2-4 days
- Finishing application: 1-2 days
- Die-cutting and window creation: 1-2 days
- Quality inspection: 1 day
| Production Phase | Standard Timeline | Rush Timeline | Quality Checkpoints |
|---|---|---|---|
| Design/Approval | 1-2 days | Same day | Client review |
| Die Creation | 1-2 days | 1 day | Precision testing |
| Printing | 2-4 days | 1-2 days | Color matching |
| Die-Cutting | 1-2 days | 1 day | Edge quality |
| Final Inspection | 1 day | Half day | Comprehensive |
Production Timeline Across Manufacturing Phases
Total standard timeline runs 12-16 business days from approval through delivery, with rush production available reducing timeline by 30-40%.
Window sleeves typically cost 15-25% more than solid sleeves due to additional die-cutting processes. This premium decreases proportionally as order volumes increase.